
Best Land Rover Series 3 Restoration Parts in 2026
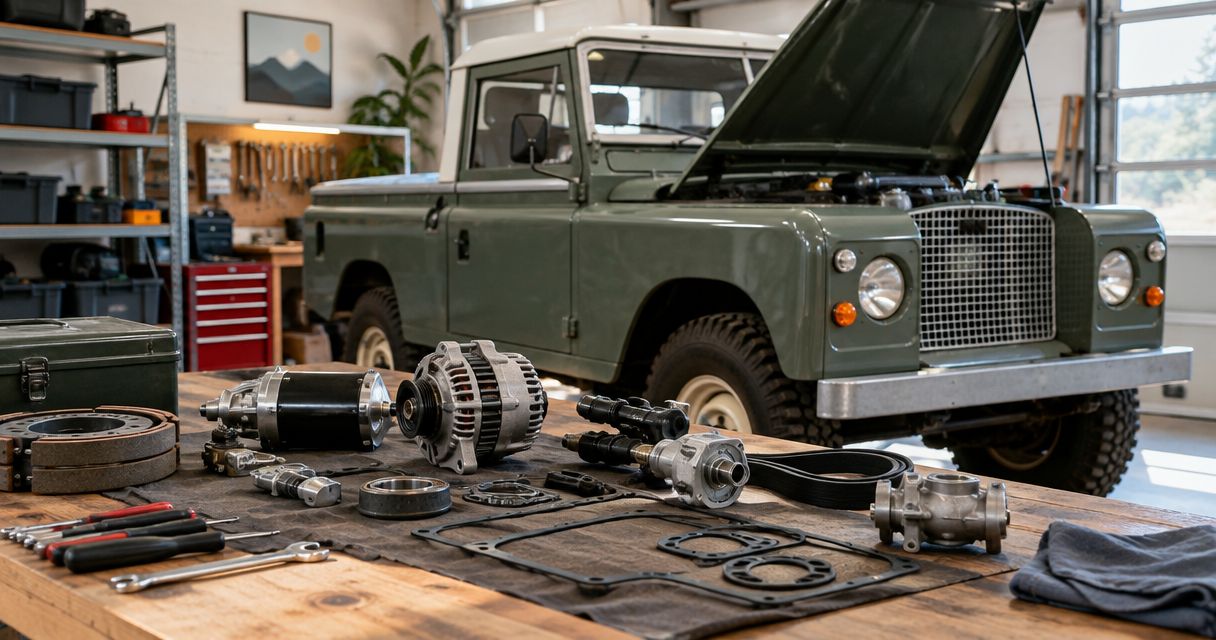
Best overall: brake restoration parts. Best for structural repairs: chassis and bulkhead repair sections. Best for a targeted weatherproofing refresh: door and glazing seals. This 2026 guide ranks Land Rover Series 3 parts by restoration purpose, with fitment checks and reasons to buy, hold or skip each category.
TL;DR
- Land Rover Series 3 parts should match the vehicle's chassis, engine and fitted assemblies, not just its model name.
- Prioritise brake, structural and steering defects before cosmetic restoration parts.
- Use TR Spares as a buying starting point, then confirm the individual part specification.
- Choose cooling, wiring and sealing parts after inspection identifies the actual fault.
Why this matters
A Series 3 restoration is not one shopping list. A vehicle needing structural repairs requires a different order of work from a sound vehicle with leaking seals or deteriorated wiring. Buying attractive finishing parts first leaves the underlying defects untouched.
For your 2026 restoration, identify the defective assembly before choosing the replacement part. Start with TR Spares, but make the vehicle's identity and the individual component specification your buying criteria. A model name alone does not establish compatibility.
The Series 3 range includes vehicles with 88-inch and 109-inch wheelbases. The familiar 2.25-litre petrol engine is also not a sufficient description of every vehicle or every engine installation. Record what is actually fitted, especially when previous owners have changed assemblies.
What makes the best Land Rover Series 3 parts?
The best restoration part solves a confirmed problem, fits the installed assembly and supports the next stage of the rebuild. Use these criteria before comparing categories:
- Verified fitment: Match the chassis details, wheelbase, engine and relevant assembly. Check the old component where accessible.
- Safety relevance: Structural integrity, braking and steering take priority over appearance. An unsafe chassis changes the entire repair plan.
- Fault coverage: Replace the failed component and inspect connected parts rather than assuming one replacement completes the job.
- Repair suitability: Decide whether the existing component needs adjustment, rebuilding or replacement before ordering.
- Installation requirements: Account for machining, welding, bleeding, alignment or electrical testing where the repair requires it.
- Restoration intent: Choose between original-style presentation and a functional repair deliberately. Do not mix incompatible components to achieve either goal.
Keep photographs, identifying marks and measurements together. That record helps you distinguish a genuinely compatible part from one that merely looks similar in a listing.
Land Rover Series 3 restoration parts at a glance
This 2026 ranking compares restoration categories, not named products. Each category has a distinct job; none replaces a condition assessment of your vehicle.
| Rank and category | Best for | Standout function | Key limitation |
|---|---|---|---|
| 1. Brake restoration parts | Returning the braking system to serviceable condition | Repair hydraulic and friction-component faults | New parts do not replace correct adjustment, bleeding and inspection |
| 2. Chassis and bulkhead repair sections | Repairing structural deterioration | Replace damaged or corroded sections | Requires assessment of surrounding metal and suitable repair methods |
| 3. Steering and suspension parts | Addressing wear and unwanted movement | Restore serviceable joints, bushes and supporting components | Alignment and diagnosis still matter |
| 4. Cooling-system parts | Repairing leaks and confirmed cooling faults | Restore coolant containment and circulation | A radiator replacement does not diagnose every overheating cause |
| 5. Wiring and electrical parts | Repairing damaged circuits and unreliable connections | Restore insulation, continuity and connections | Must match the vehicle's actual electrical arrangement |
| 6. Door and glazing seals | Improving weather sealing after body repairs | Renew deteriorated sealing surfaces | Cannot correct distorted panels or poor alignment |
1. Brake restoration parts: best for braking-system repairs
Brake restoration parts include components such as hydraulic cylinders, hoses, pipes, shoes and drums, selected for the brake arrangement fitted to your vehicle. They address wear, leakage and deterioration within the system. Treat the brakes as a connected assembly, not a collection of independent purchases.
Begin with an inspection of the friction surfaces, hydraulic components and pipe routing. Record the assembly details before dismantling; a component that fits physically is not automatically the correct specification.
Brake restoration parts pros:
- Address faults in a safety-critical system.
- Allow damaged hydraulic and friction components to be replaced individually.
- Support a complete repair when paired with inspection and correct setup.
Brake restoration parts cons:
- Replacing one cylinder does not resolve other leaks or worn friction components.
- Installation still requires appropriate adjustment, bleeding and checks.
Best for: A restoration with identified brake deterioration, leaks or worn components.
Do not treat new brake components as proof that the vehicle is ready for road use.
Verdict: Buy the verified parts needed for a complete brake repair; hold unrelated cosmetic purchases.
2. Chassis and bulkhead repair sections: best for structural repairs
Chassis and bulkhead repair sections replace damaged metal in areas where a repair is appropriate. Their purpose is structural repair, not disguising corrosion. Inspection must establish the extent of deterioration before the repair section is chosen.
Expose and assess the surrounding area rather than judging the defect from its visible edge. Record mounting points and alignment before cutting; the replacement section must suit both the vehicle and the repair plan.
Chassis and bulkhead repair sections pros:
- Target deterioration in a specific repair area.
- Retain surrounding material when that material is sound.
- Allow structural work to precede paint and finishing.
Chassis and bulkhead repair sections cons:
- Local repair sections are unsuitable when deterioration extends beyond the proposed repair.
- Welding and alignment require appropriate skills and equipment.
Best for: A vehicle with assessed structural damage that is suitable for section repair.
If the surrounding structure is unsound, skip a patch-only approach and reassess the scope of the restoration.
Verdict: Buy only after the repair boundaries and alignment requirements are established.
3. Steering and suspension parts: best for repairing wear
Steering and suspension restoration parts include joints, bushes, springs and dampers where inspection confirms replacement is needed. These components perform different jobs. A new damper does not repair a worn steering joint, and a new bush does not correct a damaged mounting point.
Inspect the system before producing the order list. Separate joint wear, loose fasteners, damaged mounts and adjustment issues so that each proposed replacement addresses a specific finding.
Steering and suspension parts pros:
- Replace confirmed sources of wear and unwanted movement.
- Allow work to be organised around the affected assembly.
- Support checks of adjacent fasteners and mounting points during dismantling.
Steering and suspension parts cons:
- Similar-looking components still require specification checks.
- Replacement does not remove the need for alignment and final inspection.
Best for: A restoration with diagnosed steering or suspension component wear.
Assess the complete steering path rather than assuming the first visibly worn joint explains every symptom.
Verdict: Buy against the inspection findings; skip replacing unrelated components by guesswork.
4. Cooling-system parts: best for leaks and cooling faults
Cooling-system parts include radiators, hoses, thermostats, pumps and related connections. Each addresses a different part of coolant containment or circulation. Select the replacement from the diagnosed fault and the engine installation, not solely from the Series 3 badge.
Inspect hoses, joints and the radiator before committing to major replacement work. Persistent overheating requires diagnosis; replacing a radiator is not a substitute for establishing why the engine is running hot.
Cooling-system parts pros:
- Repair identifiable leaks and damaged connections.
- Allow deteriorated hoses and faulty components to be replaced separately.
- Support inspection of connected cooling components while access is available.
Cooling-system parts cons:
- Engine conversions change the required component and hose arrangement.
- A cooling-system replacement cannot resolve every underlying engine fault.
Best for: A restoration with confirmed coolant leaks or a diagnosed cooling-component fault.
Check the repaired system before proceeding to finishing work.
Verdict: Buy the component that matches the fault and installed engine; hold a whole-system replacement without diagnosis.
5. Wiring and electrical parts: best for damaged circuits
Electrical restoration parts include wiring, connectors, switches, lamps and circuit-protection components appropriate to the vehicle. They restore damaged insulation, unreliable connections or failed components. A full wiring replacement and a local circuit repair are different decisions.
Document the existing arrangement before disconnecting it. For a 2026 rebuild, that record matters more than assuming the vehicle still follows its original wiring diagram after decades of ownership changes.
Wiring and electrical parts pros:
- Replace deteriorated insulation and damaged connections.
- Allow individual circuit faults to be repaired without unnecessary dismantling.
- Provide an opportunity to correct undocumented alterations.
Wiring and electrical parts cons:
- A replacement loom must suit the installed equipment and electrical arrangement.
- New wiring does not repair a faulty component or poor earth connection elsewhere.
Best for: A restoration with damaged wiring or electrically diagnosed faults.
Preserve the original routing information even when the old wiring itself cannot be reused.
Verdict: Buy after mapping the affected circuits; hold a replacement loom until its specification is confirmed.
6. Door and glazing seals: best for a weatherproofing refresh
Door and glazing seals replace deteriorated sealing material around openings. They are finishing parts, but their job is functional: closing the gap between correctly fitted surfaces. Match the seal profile and application before ordering.
Check hinges, latches, door position and surrounding metal first. A new seal cannot compensate for every alignment problem, and forcing a door against an unsuitable seal creates a new problem rather than completing the restoration.
Door and glazing seals pros:
- Replace cracked, hardened or damaged sealing material.
- Address a specific finishing task after structural and panel repairs.
- Allow a focused refresh without replacing sound body components.
Door and glazing seals cons:
- Depend on suitable panel alignment and sound attachment surfaces.
- The wrong profile can interfere with closure or leave gaps.
Best for: A structurally sound vehicle with deteriorated seals and correctly aligned openings.
Complete the underlying panel work before treating seals as the final answer to water entry.
Verdict: Buy after alignment checks; wait if the body still needs repair.
How to build your restoration order
Use this sequence to turn the ranking into an order list. It prevents a broad category label from becoming a reason to replace every component within it.
- Identify the vehicle: Record chassis details, wheelbase, engine and visible assembly identifiers.
- Inspect the assembly: Establish the defect and check connected components.
- Match the specification: Compare the replacement description with the fitted assembly and old part.
- Plan the installation: Identify the required repair work, tools and specialist tasks before ordering.
- Check the repair: Inspect and test the completed work before moving to the next restoration stage.
Choose the replacement after identifying the vehicle and inspecting the assembly.
For your TR Spares Land Rover Series 3 parts shortlist, keep one entry per confirmed repair. Include the part reference, fitted assembly details and the reason for replacement. A short, checked list is more useful than a large basket of plausible components.
Start your parts search
Keep your chassis details, assembly identifiers and repair list beside you while checking parts.
How the categories are ranked
The ranking prioritises safety relevance, fitment, repair suitability and installation requirements. It is a buying framework, not a claim that every Series 3 needs the same replacements or that individual products have been tested.
Condition overrides the numbered order. Structural deterioration requires assessment before further restoration work; a sound vehicle with a diagnosed electrical fault needs a different immediate purchase. Use the 2026 shortlist to organise decisions, not to bypass inspection.
Which Land Rover Series 3 parts should you choose?
Choose brake restoration parts as the default category to inspect first, but order only against confirmed defects. Assess the chassis, bulkhead, steering and suspension before spending on finishing work. Move cooling and electrical repairs ahead when inspection identifies faults that block the next stage.
TR Spares belongs on your Land Rover Series 3 parts shortlist only when the individual part specification matches your vehicle. That rule applies equally to a small seal and a major assembly: the correct category is not enough; the correct component matters.
FAQ
What are the best Land Rover Series 3 parts to buy first?
Buy parts for confirmed structural, braking and steering defects before cosmetic finishing parts. Inspect the vehicle first, because its condition determines the repair order.
Do all Land Rover Series 3 parts fit every Series 3?
No, the Series 3 model name alone does not confirm fitment. Check wheelbase, engine, chassis details and the relevant fitted assembly before ordering.
Should I buy a complete brake restoration kit?
Choose a complete kit only when its contents match the fitted brake system and the repair scope. Inspect connected components rather than assuming the kit includes everything the vehicle needs.
Is a chassis repair section enough to fix corrosion?
A chassis repair section is suitable only when the surrounding structure supports the proposed repair. Establish the extent of corrosion and the repair method before buying a section.
Will a new radiator stop my Series 3 overheating?
A new radiator addresses a radiator fault, not every cause of overheating. Diagnose the cooling system and engine before deciding which component to replace.
Should I replace the wiring loom during restoration?
Replace the wiring loom when inspection establishes that replacement is the appropriate repair. Confirm that the loom suits the installed equipment and electrical arrangement before ordering.
When should I fit new door seals?
Fit new door seals after checking panel alignment, hinges, latches and attachment surfaces. Seals cannot correct underlying body damage or every closure problem.
How should I check parts before ordering from TR Spares?
Compare the individual part specification with your vehicle details and fitted assembly. Keep photographs, identifying marks and the old component reference available during the check.
One last thing
Before dismantling a serviceable-looking assembly, photograph its routing, mounting points and identifying marks. The old component is evidence, even when it is worn out.
For a 2026 restoration, keep removed parts until the replacement has been matched and fitted. Do not discard your best fitment reference at the moment you need it most.
